|
|

|
How to draw a pylon
|
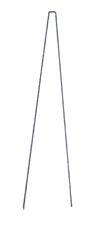
Here is one method for how to draw a pylon.
First, draw two lines that are almost vertical but are
diverging slightly, so they are wider apart at the bottom than
the top. Put a bar across the top to join both lines.
|
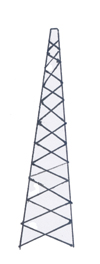
Now, fill the gap between the lines with an X pattern.
Start at the bottom and work upwards, trying to keep
all the gaps the same size and keeping the lines
of the crosses parallel with each other.
|
|
|
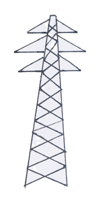
Next, add the arms. The easiest way to do this is to draw a horizontal
line for each pair, and then to join the end of this line diagonally
with the body of the pylon. You can keep all the arms the same width
or make the middle pair a little wider than the other two.
|
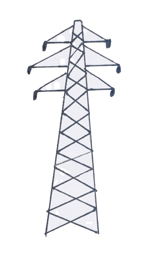
Finally, draw small filled oval blobs at the end of each arm to
represent the insulators.
You've finished!
|
|
If you know a better way to draw a pylon, or you want to share
your pylon images, please email pylons@gorge.org with your
pictures.
|

